


How to manage all of your Cloud File Services from your iPad
The iPad is slowly and surely becoming the de-facto computer for many who don’t want to shell out thousands of dollars for a Mac. This is largely thanks to the software improvements, leading up to the release of iPadOS last year. This includes many different features, including the new and improved Files app.
Related Reading
The Files app allows you to not only manage local storage, but also makes it possible to manage all of your Cloud File Services from your iPad. Gone are the days of needing to download and use all of the different apps just to access files in different places. Now, you can access, edit, organize, and manipulate those files that are strewn across different cloud file services.
Which cloud file services are compatible with iPadOS and the Files app?
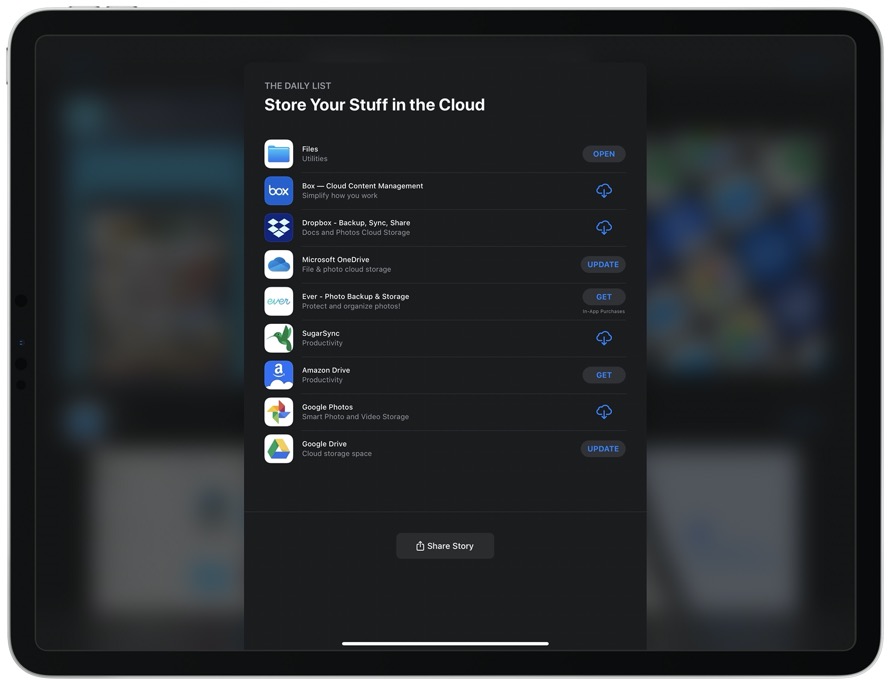
Cloud storage services are seemingly a dime-a-dozen nowadays, but that’s not a bad thing. Having options is always great, so that you and your files aren’t tied to one location. And with the updated Files app, many of these services tie right in, so you can access everything from one place.
Here are some of our favorites:
iCloud Drive – This is the most obvious one, as it’s what you will be working with by default (other than local storage). Every Apple user is provided with 5GB of storage for free, and then you can sign up for more via the iCloud account settings in the Settings app.
Dropbox – Another fan favorite is Dropbox, despite recent price increases to the monthly subscriptions. Getting started, users will get 2GB of storage to work with, which is really not enough to store anything but text files and maybe a few pictures. Then, you’ll need to sign up for Dropbox Plus if you run out of space.
Google Drive – Regardless of whether you are an Android convert, or have had a Gmail account forever, Drive will be the go-to for many. The Google Drive app itself is rather wonky, but you can attach and access your Drive account from the Files app easily.
OneDrive – One of the biggest benefits to using OneDrive is the amount of storage you get if you have Office 365. Microsoft provides up to 5GB of storage for free, with the next available option of 50GB for $2 per month. But if you subscribe to Office 365 Personal ($69.99/year or $6.99/month), Microsoft gives you 1TB of cloud storage.
Box – This company came out of nowhere back when the service launched, but is one of the better deals for those wanting to abstain from subscriptions. Box offers 10GB of storage for free, but that bumps up to just 100GB for $10 per month for the “Personal Pro” plan.
There are other third-party cloud services that are compatible with the Files app, such as Mega and SugarSync. But the aforementioned options are some of our favorites, while also being more popular than others. If you are trying to decide what to use, try them out and see what works better, but just get ready to subscribe if you want to host your files in the cloud.
How to add third-party cloud file services to Files on iPadOS

If you have determined which cloud service you will use, you’ll need to get the documents and all to show up in the Files app. Here’s what you’ll need to do, regardless of what service you are using.
- Download and set up the third-party cloud service application.
- Open the Files app on your iPad.
- Tap the Browse tab at the bottom.
- Tap the More button in the top right-hand corner of the sidebar.
- Select Edit.
- Toggle the apps and services you wish to access to the On position.
- Tap Done in the top right-hand corner.
Once you have connected the service to the Files app, you will be able to quickly access it from the sidebar. And you can even use the basic search function at the top to locate something specific, regardless of if you’re in a different area of the app.
How to connect to a file server from the Files app on iPadOS

Some folks or workplaces require you to connect to a file server in order to access different files. Maybe this is a personal file server at home with your personal information stored, or maybe it’s your job and you need to get access files to get the job done.
These are the steps you’ll need to take to connect to a file server from the Files app:
- Open the Files app on your iPad.
- Tap the Browse tab at the bottom.
- Tap the More button.
- Select Connect to Server.
- Enter the proper SMB address in the dialog box.
- Enter the login information if required.
- Tap Connect.
After your iPad has connected, the Server Name will appear under the Shared section in the Browse tab. Then, you can access or move files between your iPad and the server with ease.
Commonly asked questions about managing cloud file services from iPad
The Files app on your iPad and iPhone has more tricks up its sleeve than you may realize. We’ve already covered connecting to a local network and adding these third-party services to the app. But we have compiled a quick list of some of the other commonly-asked questions when managing documents, folders, and more from the Files app.
Can you zip and unzip files?

Yes, you can both zip and unzip files from the Files app on your iPad or iPhone. From the Files app, locate the .zip file, press and hold on it, and tap Compress. This will turn the document or picture into a ZIP file. Then, you can follow the same steps and select Uncompress and the folder will unzip into its current location.
How to rename files

Back when Files was released, finding your various documents could be a hassle, even if you tried to organize them. This headache has been alleviated, as you can now search for specific file names. Just tap the Search Box at the top of the page, enter what you’re looking for, and the documents will appear. This will search across all of your attached locations, so you won’t have to go through each one individually.
Add favorite folders and documents

If you regularly access specific folders and documents, you can now Favorite them and have them appear in the sidebar. In order to do so, locate the folder or document you wish to favorite, press and hold on it, then tap Favorite. Then, you can view these files in the sidebar under Favorites.
Move files and folders via Drag and Drop

Multi-touch along with drag & drop are truly a blessing for those who have to move files and folders around. Hold down on the first document that you want to move, and then tap on the others that you wish to move. Then drag them around, and with your other finger, open the destination location and let go of the files.
How to restore recently deleted files

Nobody wants to deal with accidentally losing a folder or document, only to realize later that you deleted it. Thankfully, Apple recognizes that mistakes happen and has made it easy to recover and restore those deleted files.
- Open the Files app
- Tap Browse
- Select Recently Deleted from the sidebar
- Press and hold down on the file you need to restore.
- Tap Recover
What is the Quick Menu?
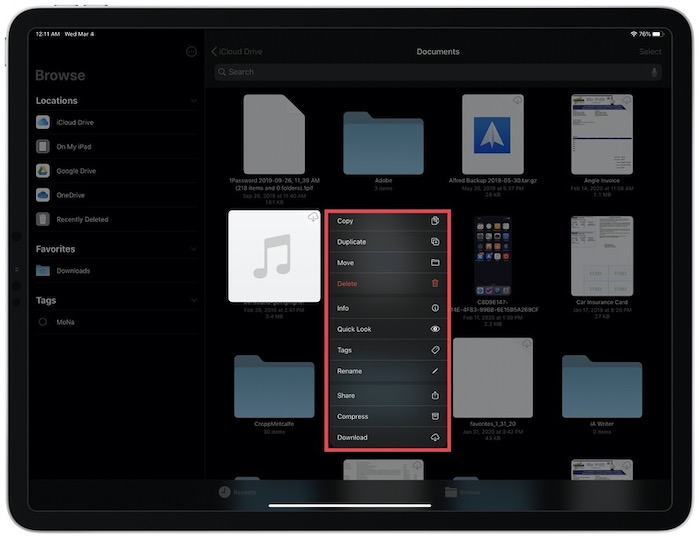
Context menus are becoming the “next big thing” when interacting with all sorts of aspects of iPadOS and iOS. These contextual menus provide you more options than you would normally have access to, and the same is true for the Files app. To tinker around with these menus, press and hold on a document or folder, and then let go. Then, you’ll see the following depending on what type of file it is:
- Copy
- Duplicate
- Move
- Delete
- Info
- Quick Look
- Tags
- Rename
- Share
- Compress/Uncompress
- Download
This makes it quick and easy to manipulate, edit, or move items in the Files app, without jumping through a bunch of hoops.
Take advantage of keyboard shortcuts
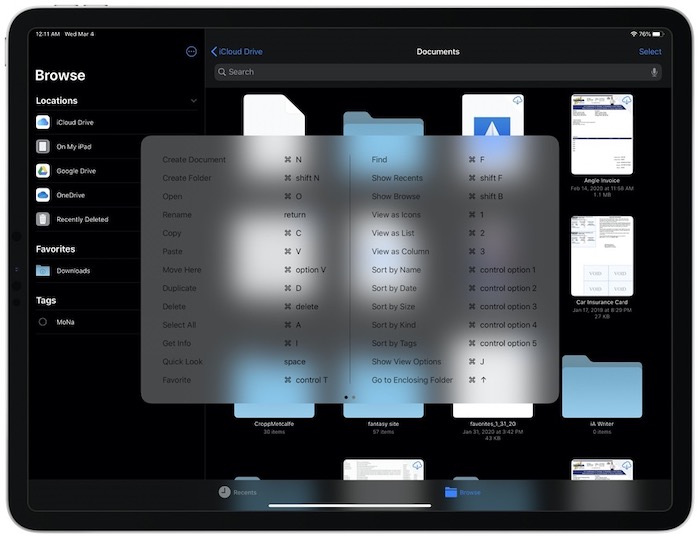
It was only a matter of time before Apple gave users more controls through the help of keyboard shortcuts. Across all of iPadOS, these shortcuts can make life much easier, and remove the need for touching the display at all. In the Files app, a slew of new keyboard shortcuts have been added, including the ability to press Shift+Command+N to create a new folder, or to quickly look at a document by highlighting it and tapping the Space Bar.
Can other apps access Files and the storage services?

While you can use third-party cloud services to organize your various files across multiple devices, other apps have access to the Files app as well. These apps make it easy to save or open files from the Files app on your iPad and then save them or export them elsewhere. Here are some of our favorites:
Documents by Readdle (Free w/IAP) – This app is touted as being “a central hub for all your files”, making it possible to annotate PDFs, read books, and even consume media. Before the Files app was available, Documents was the go-to choice for a Finder app for the iPhone and iPad.
PDF Expert (Free w/IAP) – If you ever interact with PDFs, you’ll want to try out PDF Expert. From the app, you can edit, annotate, customize, and do so much more with PDFs. You can even fill out forms and sign documents, and then save them to the Files app on your iPad.
FileBrowser ($6.99) – Despite being the only app on that list that requires you to pay up front, FileBrowser has become a favorite for just about everyone that does serious file management. The app automatically scans your network for servers to connect to, including other computers on the network. Plus, you’ll be able to play movies and music, along with edit and markup any documents that you have stored.
Conclusion
The iPad is really a wonderful device to get work done, and with the Files app, it’s easier than ever to access your files. It doesn’t matter whether they are stored in the cloud, or are available locally on your iPad. The Files app can handle everything you need it to, and makes it easy to manage all of your Cloud File Services from your iPad.
If you have any questions about managing your cloud file services from your iPad, let us know in the comments. In the meantime, let us know what cloud services you use on a regular basis and why you use those over the other options.
Andrew is a freelance writer based on the East Coast of the US.
He has written for a variety of sites over the years, including iMore, Android Central, Phandroid, and a few others. Now, he spends his days working for an HVAC company, while moonlighting as a freelance writer at night.